blog 2 Ink
Making Ink
In my book, you’ll find several step-by-step chapters — and making ink is one of them. Autumn is the perfect season to get started. And since this is the last newsletter of the year, I’m sharing a simple recipe for creating your own natural ink!
You can use all sorts of materials from the forest. It’s easy, and also really fun to do with children — perhaps during the autumn break.
What you’ll need
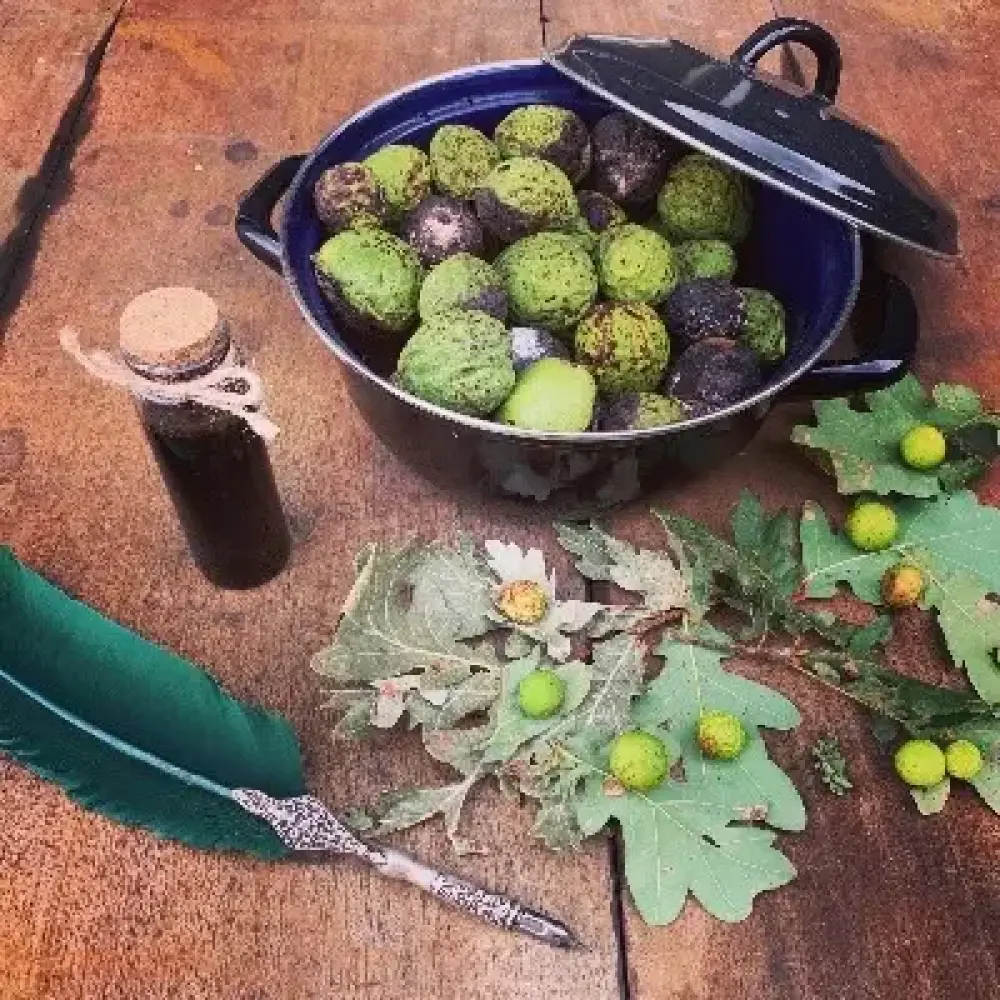
• An old pan
• Sieve
• Cheesecloth or an old stocking
• Clove oil
• Gum arabic
• Empty bottles or jars
• Natural materials to make your ink
⸻
The recipe
Head into the forest or your garden and gather the materials you’d like to turn into ink. Two handfuls of walnut husks, oak galls (those little round balls growing on oak leaves), alder cones, or berries are perfect options. Feel free to experiment! Just be mindful when working with children — some berries can be toxic.
Place your gathered materials into an old pan and add enough water to cover them. If you’re using oak galls, gently crush them with a hammer first.
Bring the mixture to a boil, then let it simmer gently for about an hour. After cooking, let it cool down in the pan. The longer you leave it to steep, the deeper and richer the final color will become.
Strain the mixture through a sieve lined with cheesecloth or an old stocking. Add a few drops of gum arabic to the strained liquid — this helps the ink flow more smoothly on paper.
Pour the ink into empty jars or bottles, and add a few drops of clove oil to each one (or drop in a few whole cloves). This helps preserve the ink.
Note: you’ll often notice a thin layer of mould forming on top of the ink over time. This is harmless — simply remove it before using the ink. It won’t affect your drawings.
⸻
Have fun!
Stay inspired
From natural inks to hand-shaped ceramics — here I share recipes, stories, and quiet craft from my studio in Norway.
Want to read more? Follow Lilly’s Fable on Instagram or sign up for the newsletter.